A little Christmassy collaboration with my talented brother-in-law Matt Isaac who recorded some beautiful classical guitar tracks for Christmas. I was very excited to get involved and help design the cover, and make up the cases for gifts.
Pages
Showing posts with label Christmas. Show all posts
Wednesday, 24 December 2014
Monday, 8 December 2014
Christmas lino print cards
Monday, 1 December 2014
Hand-painted baubles
This isn't a new idea I have to admit, I made these a couple of years ago for my sister's shop Green Homeware in Devon. This year I pulled out the stops to decorate our very first tree in our new home!
It all begins with some shiny basic baubles, homemade papier mach paste - made from water and flour, some torn brown paper and some paint & varnish to decorate.
Click on the link to see what happened last time....
Saturday, 29 November 2014
Hand-made festive wreath
This was an exciting project for me, making my first wreath for our new home with the help of my talented friend Imelda. Here's the visual story of how it happened, starting with the holly and evergreen collection from the field next to home!
Finish with oven dried orange slices, bundles of cinnamon and bright red Christmassy ribbon!
I started with Imelda's posh wreath bases made from moss covered straw. Next made small bundles of mixed evergreen and tied them to the base with fine metal wool. This carries on right around the wreath till it is completely covered.
Finish with oven dried orange slices, bundles of cinnamon and bright red Christmassy ribbon!
Friday, 7 December 2012
Christmas is coming!
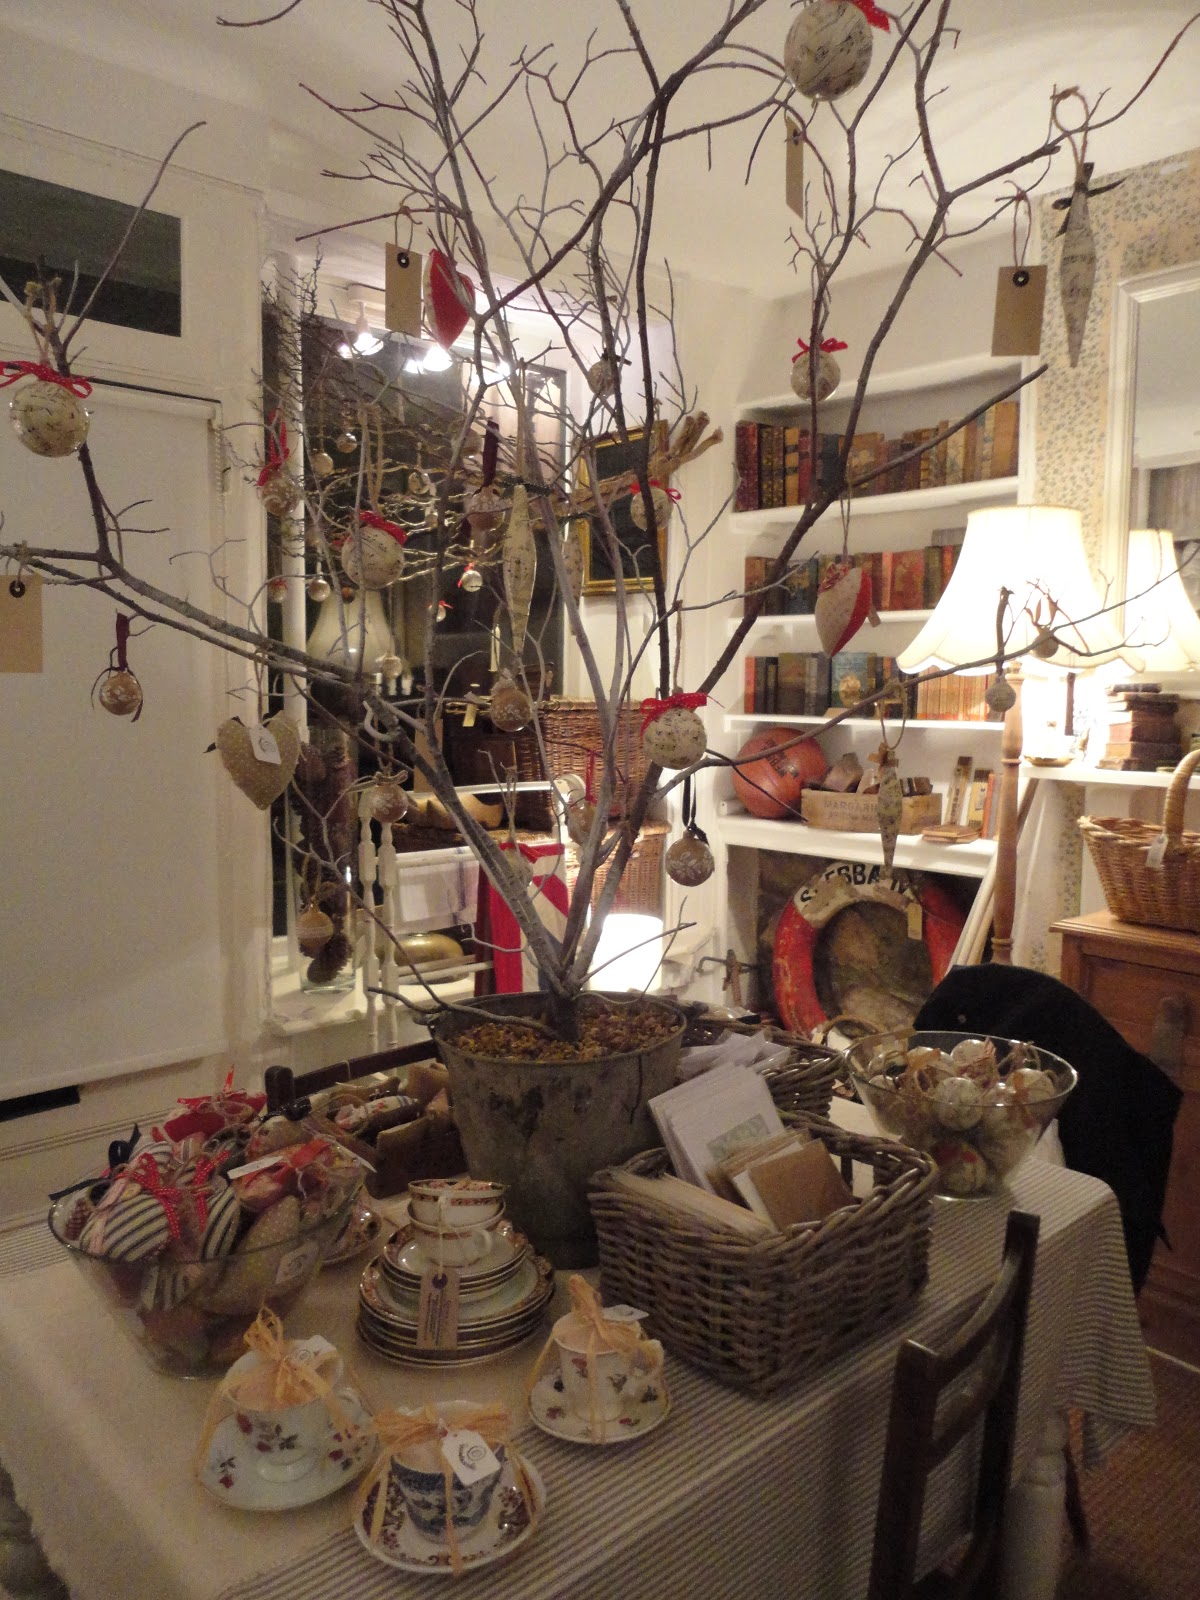
Christmas is coming hurrah! Here are just a few of the bits and bobs family, we've been making for the shop in Devon. The idea has been to re-use & recycle old decorations and scraps of fabric for a vintage, homely feel. I hope you like it as much as we've enjoyed making it all!
Handmade scented lavender hearts made by yours truly - for decorations & gifts, decorated with buttons and festive ribbons

Hand papier mached, painted, glossed and be-ribbonned with love!
Really enjoyed making these as they look so vintagey. Great way to re-use old baubles and make pretty displays in your home.
Beautiful hand sewn pin cushions by the talented Felicity Gray, using vintage scraps and shiny old buttons!

I handpoured these scented wax teacup candles, using old crockery, mis-matched cups and saucers.

Hand printed wrapping paper and cards above & below. My sister and I made music paper bunting too - a cheap and cheerful way to use old paper and string (See earlier post for a step-by-step guide!)

And finally - Green's at night as we were setting up the Christmas Window and display.

Handmade scented lavender hearts made by yours truly - for decorations & gifts, decorated with buttons and festive ribbons
Hand papier mached, painted, glossed and be-ribbonned with love!
Really enjoyed making these as they look so vintagey. Great way to re-use old baubles and make pretty displays in your home.

I handpoured these scented wax teacup candles, using old crockery, mis-matched cups and saucers.

Tom Green's own window display, with a hamper full of treats including gifts from the shop and wrapped presents! Chopping boards or hand hewn peg rails make gorgeous gifts.

And finally - Green's at night as we were setting up the Christmas Window and display.

Thursday, 6 December 2012
How to make music paper bunting!
At a recent Country Living fair in London I was inspired by some gorgeous ordinance survey map paper bunting. Here's my festive alternative: super cheap & easy to put together - makes a cute gift or decoration for Christmas! Happy making!
1. Start with piles of old music paper
and brown string/ twine.
2. Fold a sheet of music paper in half, and with the fold at the top, cut a double sided 'V' for your bunting shape. You need approx 16 of these for 1 string. 3. Cut a piece of string just over 2 metres long and make a
loop at each end for hanging. (as above)
4. Stringing the paper: Start at one end and fold the paper over the string. Glue one inside 'V' with prit-stik (left) and fold sides together firmly.
5. Carry on folding, gluing & sticking at intervals till string of bunting is complete!
6. Ta da!! Here is an example of the completed string, you don't have to stop with one length and can make the 'V's any shape you like - flags look sweet too.
I packaged mine up into clear cello bags (find them on ebay & craft stores - they're usually used for card packaging) with a little label and they're ready to go! Here they're for sale at Green's in Devon:) xx
Subscribe to:
Posts (Atom)