Pages

Showing posts with label gifts. Show all posts

Monday, 30 June 2014

Artworks for sale on my new Etsy Shop!

More excitingness! I have opened an ETSY shop, featuring lots of mounted drawings, prints and paintings! I'd love you to pop by and have a look! Hopefully I will update regularly, so do keep checking and get in touch if you would like to commission a design!


And a glimpse at my 'Meet the shop owner' page..!


Monday, 19 May 2014

New card making for Furniture Magpie

I'm getting stuck in making cards to sell at Furniture Magpie in Barnstaple and loving it! Here they are mixing it up a little with floral retro fabric, and inspired by the lovely furniture..
 

Retro inspired children's cards..

Can you tell I've been in London for the weekend?

Please get in touch if you're interested in  a commission!x

Monday, 30 September 2013

Handmade wedding chutney favours..

I don't have any pics of the works in progress of these little numbers but I thought it was worth sharing a I think the result was really pretty.

DIY...

1) Firstly, I hand wrote out the label, (lots and lots of times till I got it right!)
2) Scanned it in, and reworked in photoshop to produce a design which I then....
3) Had made into a little stamper (just on vista print!).
4) I bought some cute brown labels on ebay and then handstamped the labels.

If anyone really liked, or really wants the recipe - get in touch, it's my mama's and I have it to hand somewhere in my kitchen!

The final design:

Secondly, my mama made vats of delicious homemade apple chutney, and we spooned this into sterilised mini jars (also from ebay). Last but not least, we cut out hundreds of little pastel coloured fabric circles and tied them on with some thin brown twine.

Et voila.. the finished favours!

Wednesday, 10 July 2013

My very first sugar roses

Well this week I made.. sugar roses as cake decorations! Very kitsch I know, but totally addictive and enjoyable! Don't judge please, this was my very first time..!
The hilarious cake it was intended for at work!

Friday, 7 December 2012

Christmas is coming!

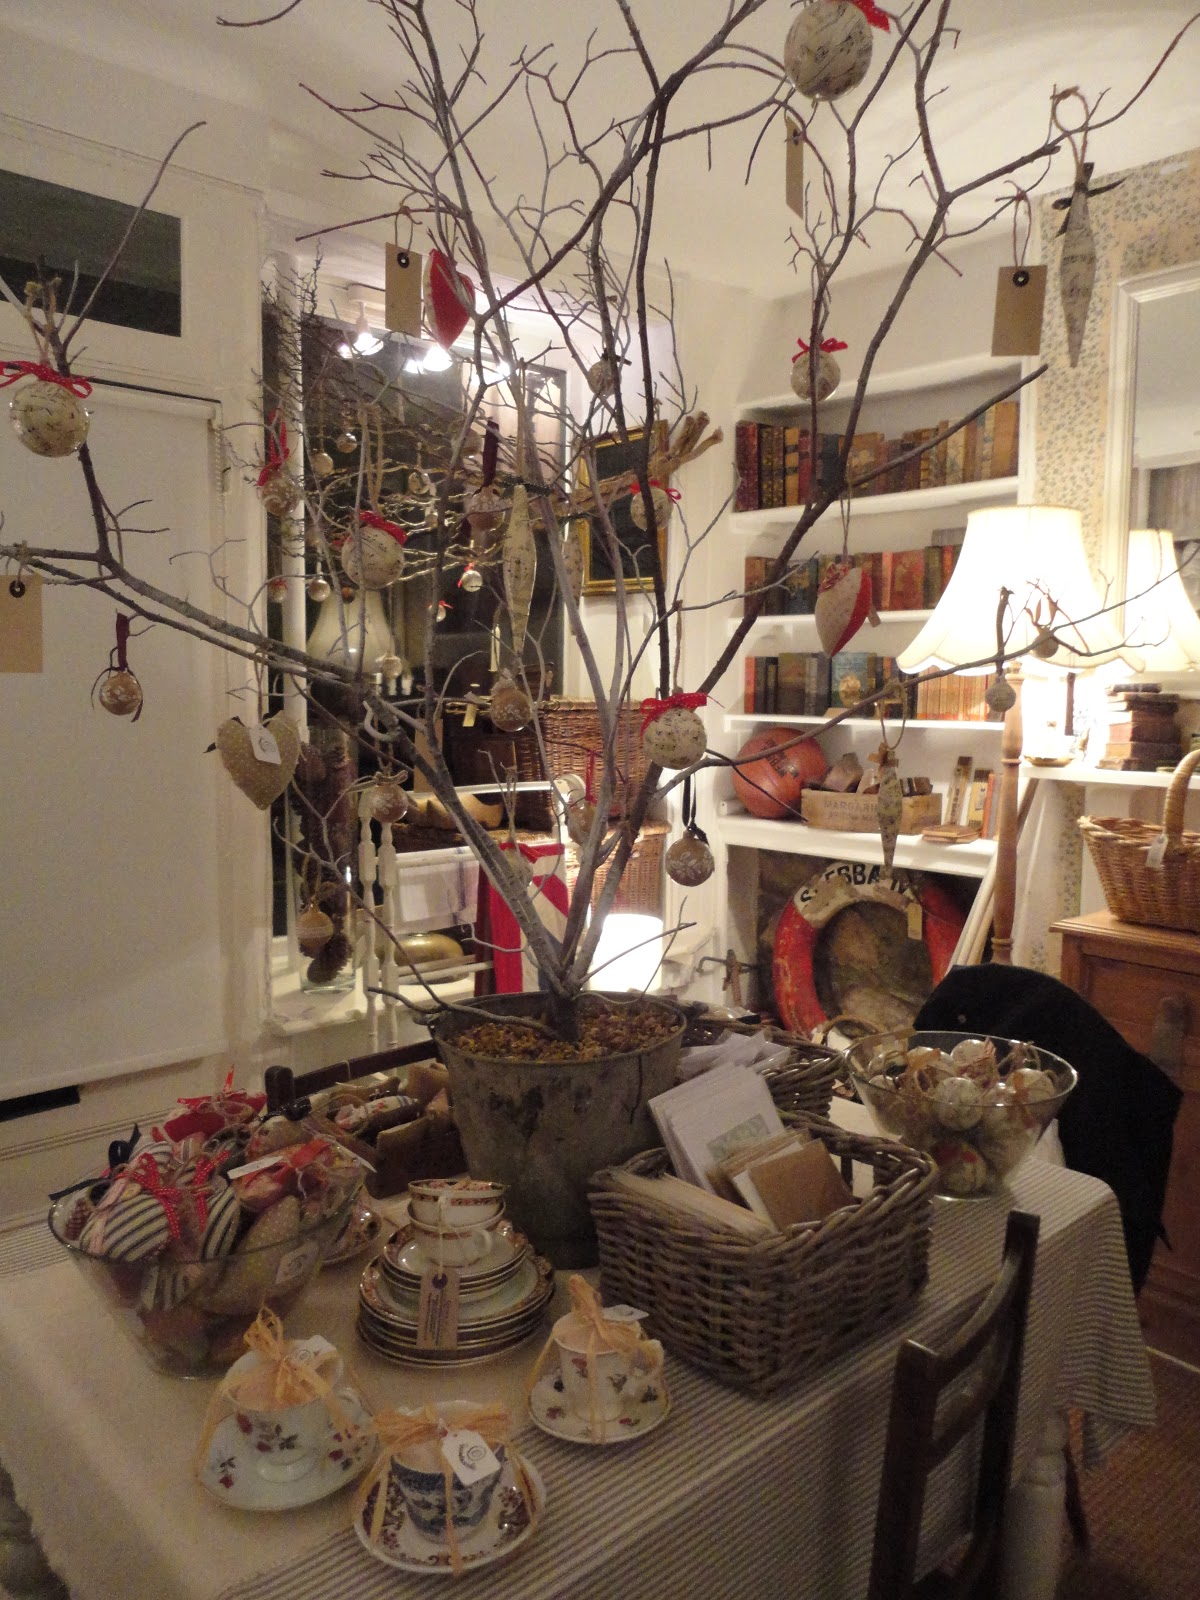
Christmas is coming hurrah! Here are just a few of the bits and bobs family, we've been making for the shop in Devon. The idea has been to re-use & recycle old decorations and scraps of fabric for a vintage, homely feel. I hope you like it as much as we've enjoyed making it all!


Handmade scented lavender hearts made by yours truly - for decorations & gifts, decorated with buttons and festive ribbons


Hand papier mached, painted, glossed and be-ribbonned with love!


Really enjoyed making these as they look so vintagey. Great way to re-use old baubles and make pretty displays in your home.


Beautiful hand sewn pin cushions by the talented Felicity Gray, using vintage scraps and shiny old buttons!


 I handpoured these scented wax teacup candles, using old crockery, mis-matched cups and saucers.


Tom Green's own window display, with a hamper full of treats including gifts from the shop and wrapped presents! Chopping boards or hand hewn peg rails make gorgeous gifts.


Hand printed wrapping paper and cards above & below. My sister and I made music paper bunting too - a cheap and cheerful way to use old paper and string (See earlier post for a step-by-step guide!)


And finally - Green's at night as we were setting up the Christmas Window and display.


Thursday, 6 December 2012

How to make music paper bunting!

At a recent Country Living fair in London I was inspired by some gorgeous ordinance survey map paper bunting. Here's my festive alternative: super cheap & easy to put together - makes a cute gift or decoration for Christmas! Happy making!


1. Start with piles of old music paper
    and brown string/ twine.


2. Fold a sheet of music paper in half, and with the fold at the top, cut a double sided 'V' for your bunting shape. You need approx 16 of these for 1 string.                                                3. Cut a piece of string just over 2 metres long and make a
                                                                 loop at each end for hanging. (as above)

 4. Stringing the paper: Start at one end and fold the paper over the string. Glue one inside 'V' with prit-stik (left) and fold sides together firmly.


5. Carry on folding, gluing & sticking at intervals till string of bunting is complete!


6. Ta da!! Here is an example of the completed string, you don't have to stop with one length and can make the  'V's any shape you like - flags look sweet too.

I packaged mine up into clear cello bags (find them on ebay & craft stores - they're usually used for card packaging) with a little label and they're ready to go! Here they're for sale at Green's in Devon:) xx

Sunday, 1 January 2012

Perfect present packaging

Are these, or are they not, the most beautifully wrapped gifts you've ever seen? Courtesy of my sister Catharine, I hope to share more wrapping and prints in the months to come..